User Guide - Snippets for Bitbucket
Snippets configuration
Log into Bitbucket as an Administrator and click Bitbucket Administration > Add-ons > Snippets configuration.
Select from the following configuration options:
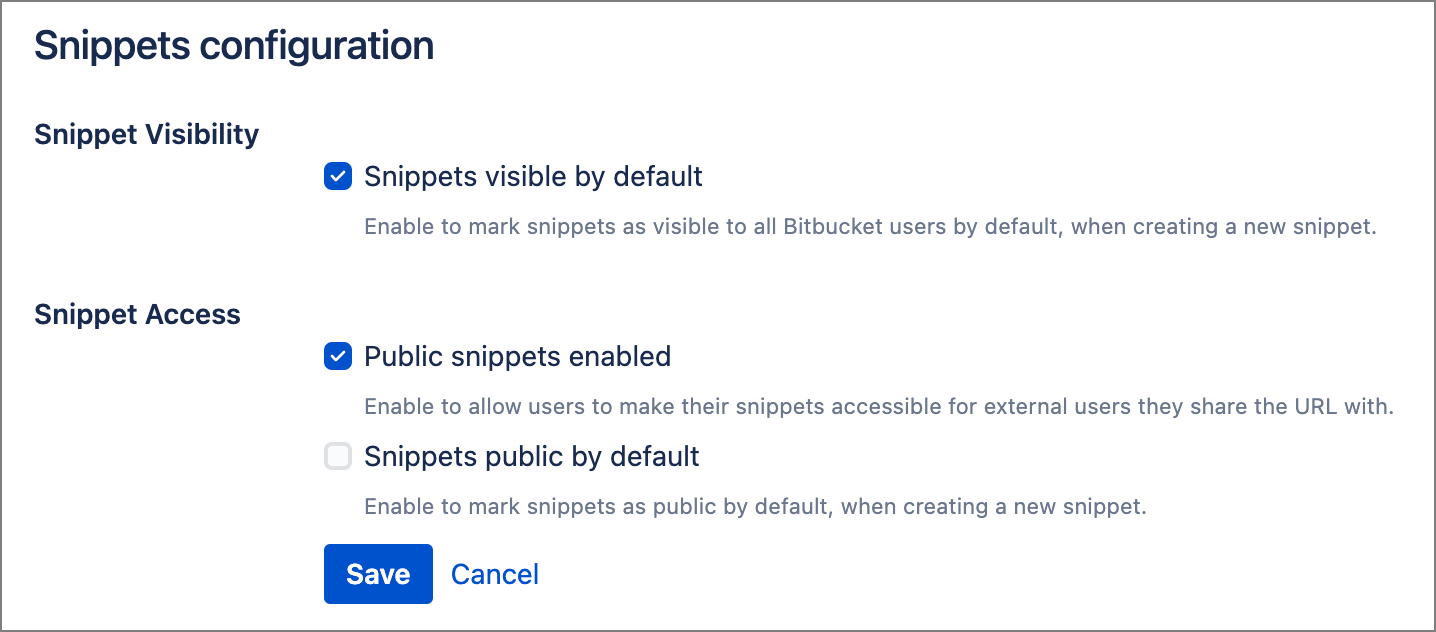
Click Save when finished.
You can also access the Snippets configuration page by clicking Bitbucket Administration > Manage Apps.
Using Snippets for Bitbucket
Access snippets from the Snippets menu in the Bitbucket page header.
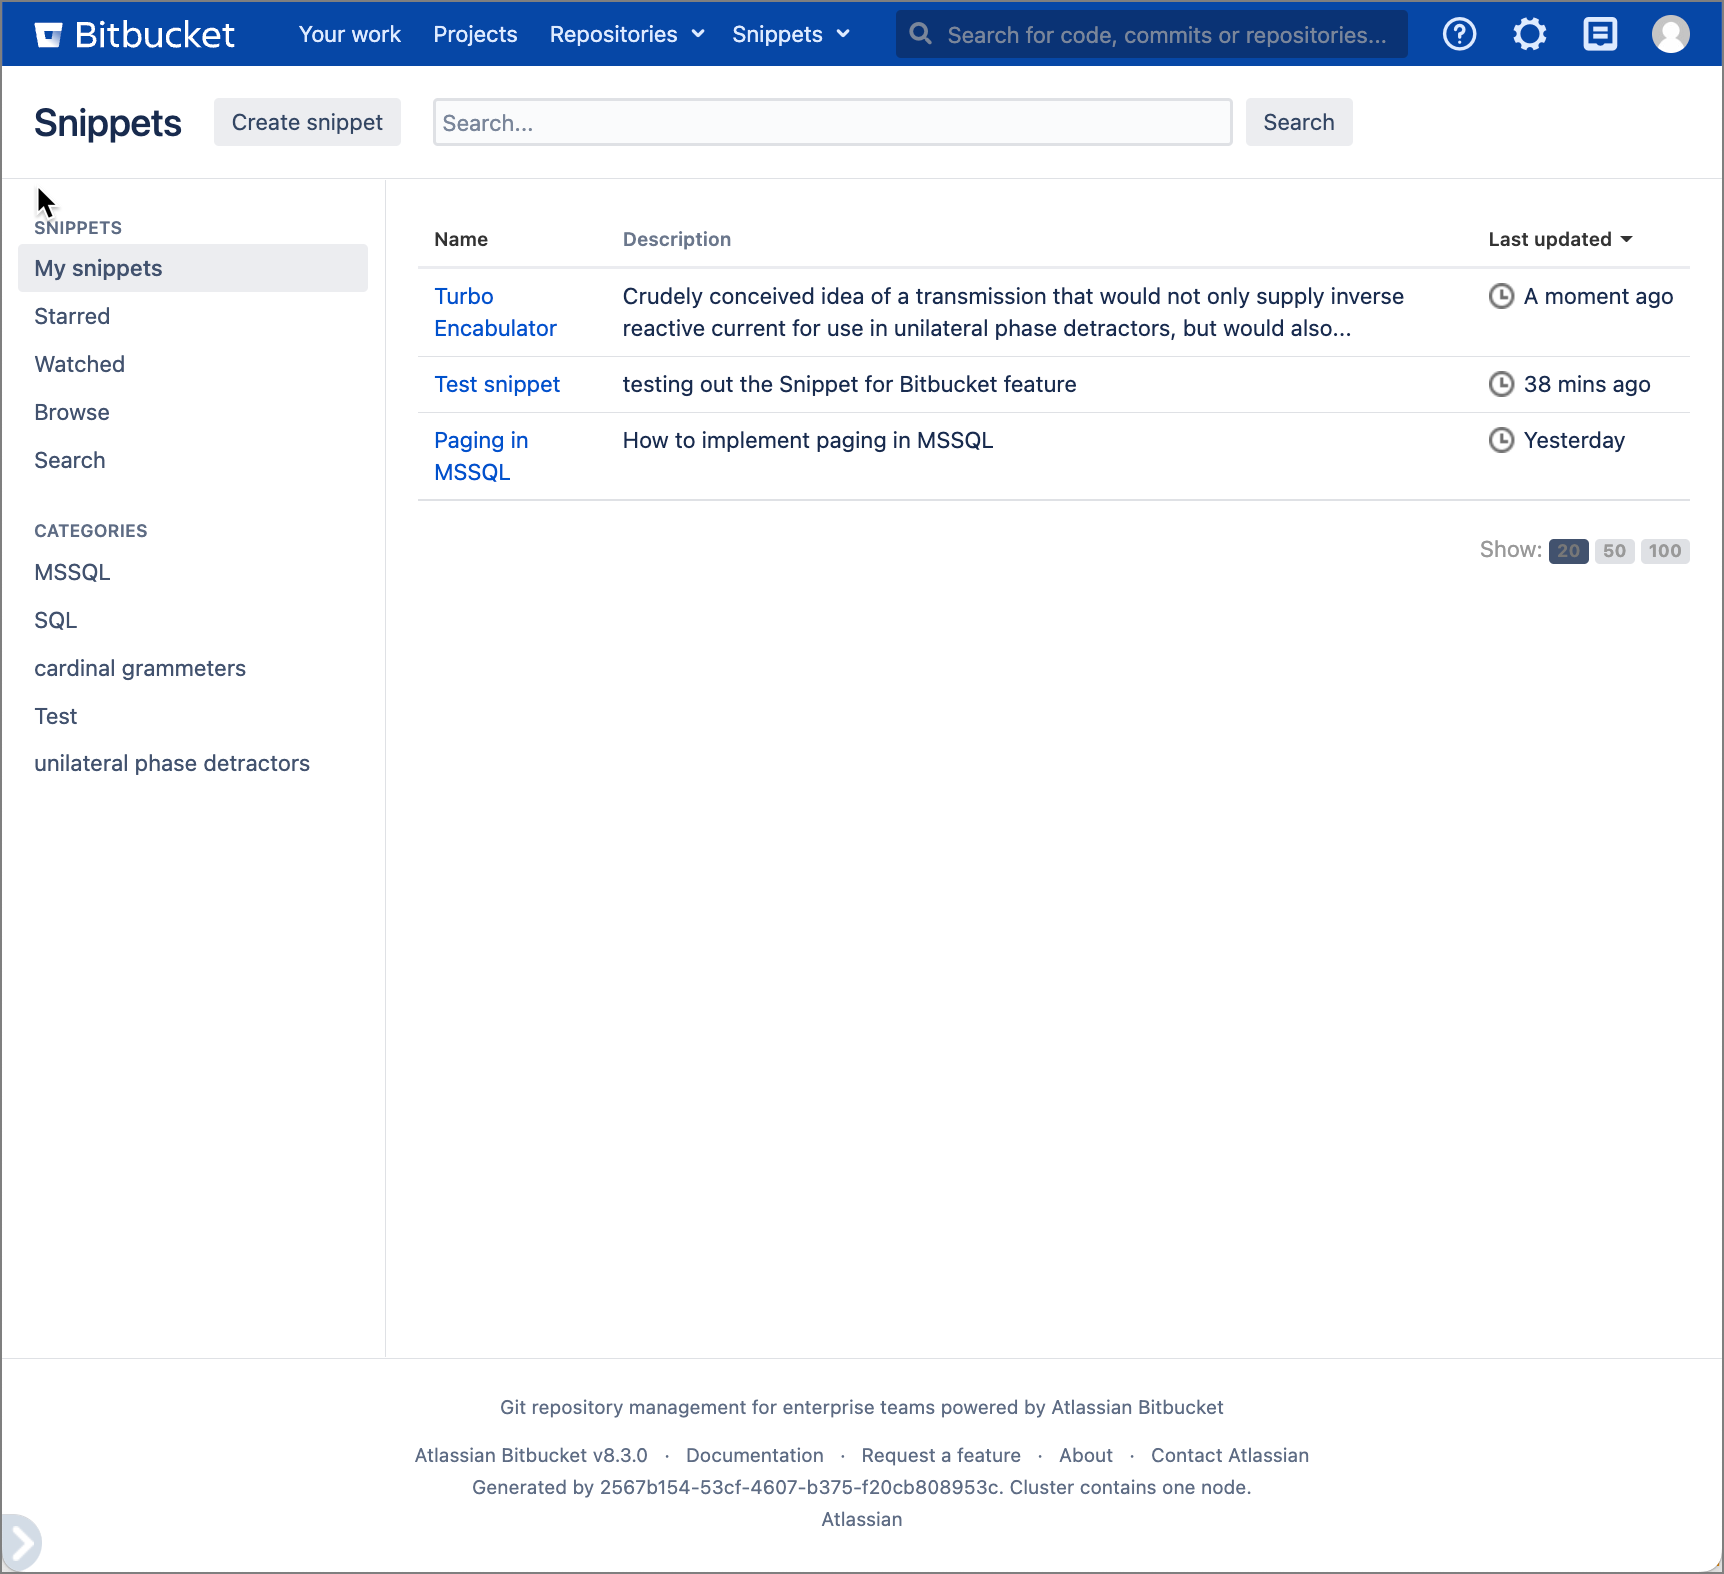
Create Snippet - Opens the Create Snippet page
My snippets - List of snippets you created
Starred - Click Star on snippets from other users for those snippets to appear in this list.
Watched - List of previously viewed snippets
Browse - Browse from the complete list of visible snippets.
Search - Enter keywords in the Search field.
At this time, the search feature only searches through snippets you have created, not all visible snippets.
Categories - Click on a category to display a list of snippets associated with that category.
Click on the name to open the snippet.
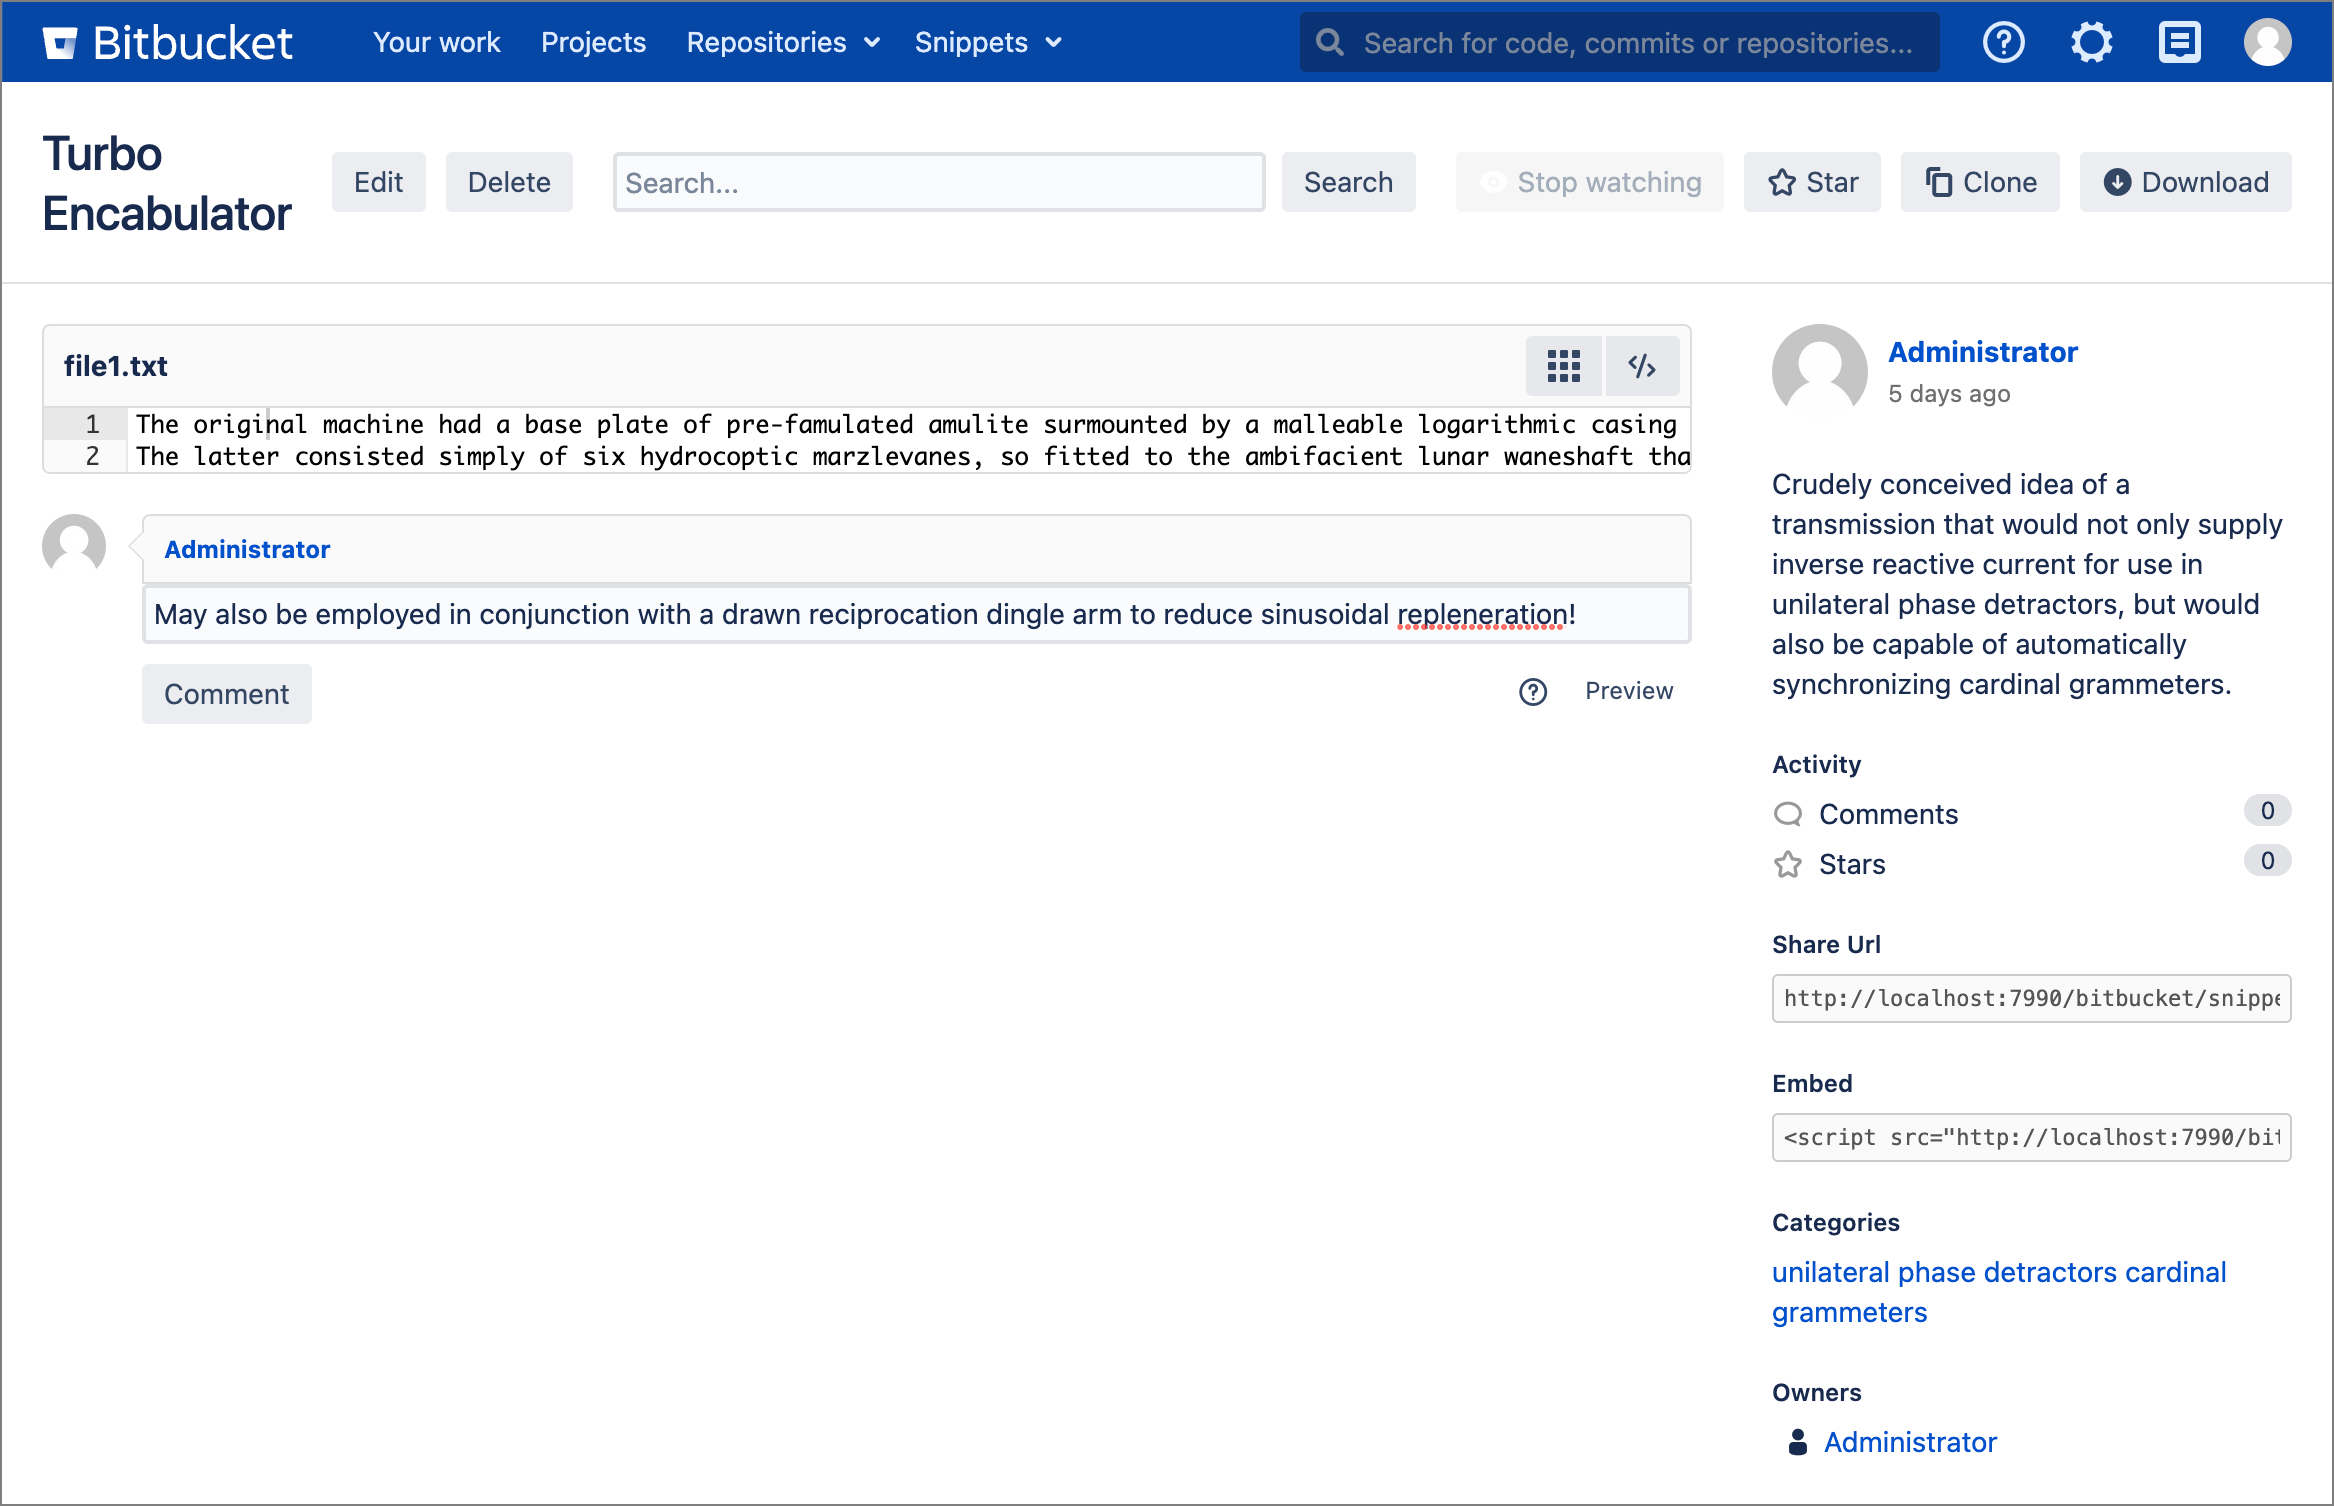
The snippet page contains these options:
Edit - To edit a snippet, you must be one of the owners, or the option allowing any Bitbucket user with access to the snippet to modify or delete must be enabled.
Delete - To delete a snippet, you must be one of the owners, or the option allowing any Bitbucket user with access to the snippet to modify or delete must be enabled.
Star - Star snippets created by other users to add them to your collection of snippets.
Clone - Create a new snippet using the selected snippet as a staring point
Download - Download a zip file containing the files from the snippet.
Categories - Discover other snippets in the same category.
Comments - Leave a comment or read comments from other users.
Raw files - Display the raw content of the file within your browser.
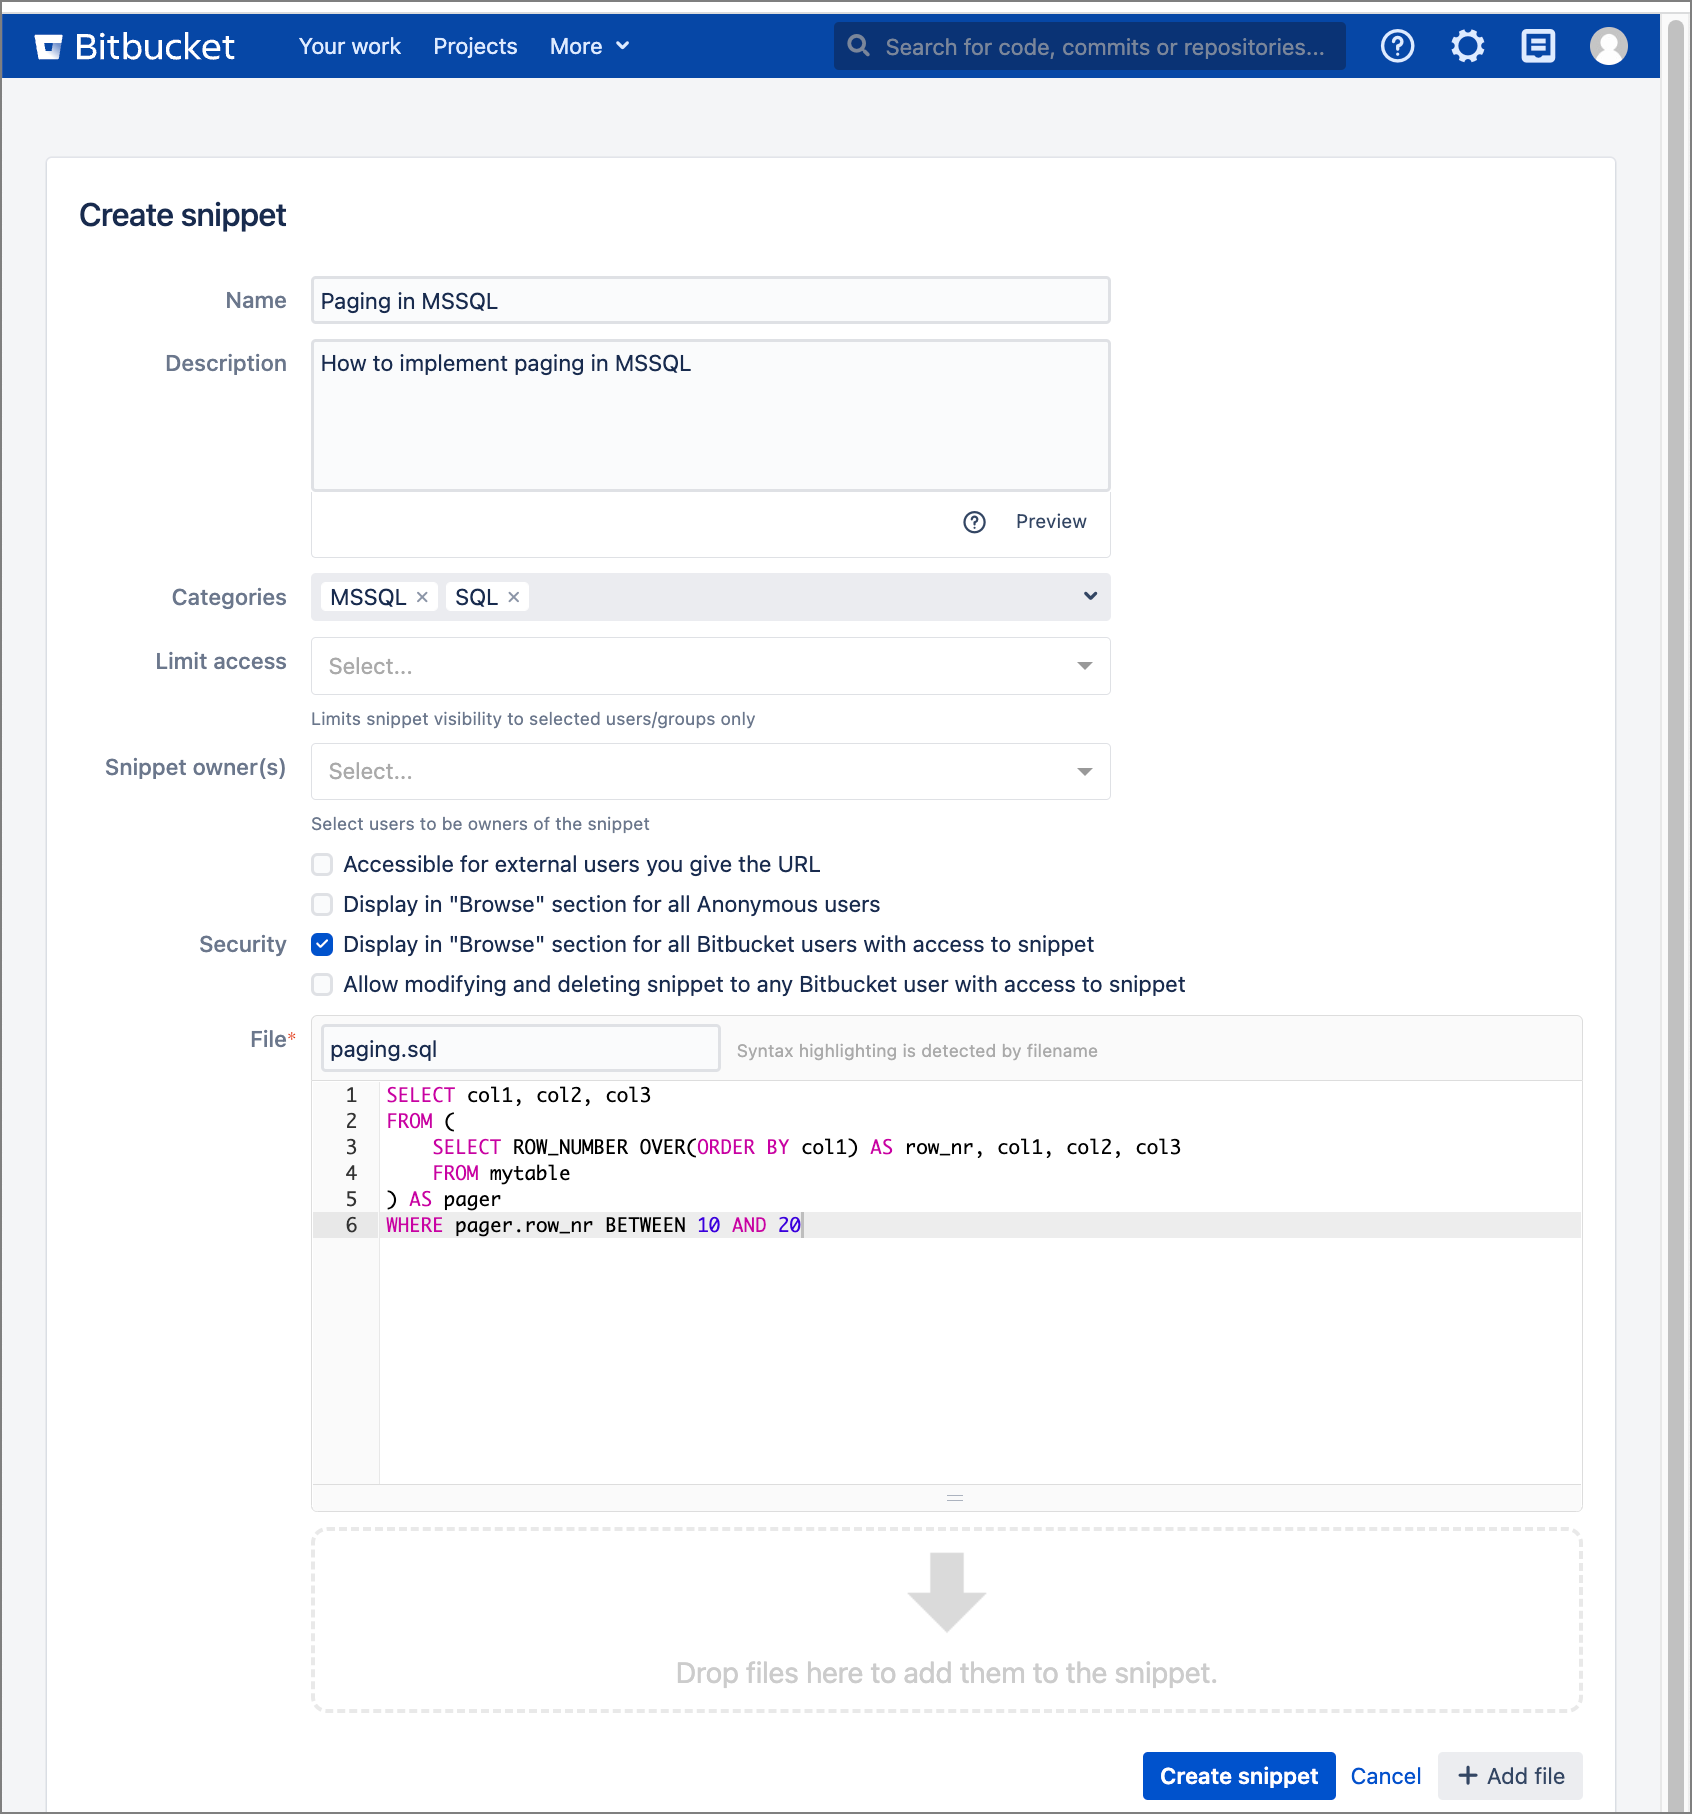
Create a new snippet
Click Create snippet in the snippets overview.
Specify a name and an optional description which supports Markdown syntax.
Categorize your snippet by assigning one or more categories.
Limit access to the snippet by user or group of users.
Set the owners of the snippet. There are three groups of users that have full access and rights to administer the snippet:
Author of the snippet
Administrators of Bitbucket
Users/groups set as owners on snippet settings
Control the visibility and accessibility of your snippet:
Accessibility - Choose whether your snippet is accessible to external users that have the snippet URL.
Visibility - Choose whether your snippet is visible in the Browse section of the snippets overview to either all anonymous users or to any Bitbucket users with access to the snippet.
Security - Choose whether users with access to the snippet can modify or delete the snippet.
Ownership of the snippet overrides the Limit access field setting. Users that belong to any of those groups have access and permission to modify the snippet even if they are not granted access by the Limit access field.
Markdown files are rendered directly when viewing a snippet if the file name has one of the following extensions: .md, .markdown, .mdown, .mkdn or .mkd. Learn more about the supported syntax in the Markdown Syntax Guide.
Sharing Snippets
After creating your snippet, you can share it with other users by copying the snippet link displayed in the sidebar. Once other users know the URL of your snippet, they can share it as well, add a comment, or star it for later use. Use the Bitbucket @mentions feature to notify and involve users to snippet discussions. By starring a snippet, the snippet becomes available in your own starred snippets collection. You can also download a snippet with all files as a zip file or view the raw file directly in your browser.