Bitbucket configuration
Once you have successfully configured your Jenkins instance, the next step is to configure the Bitbucket instance.
Log into Bitbucket as an Administrator.
Select the repository you want to associate with Jenkins.
Click Repository Settings from the left sidebar.
Click Hooks.
Locate Webhooks to Jenkins for Bitbucket Server under the Post Receive heading and select Enabled from the dropdown to open the Webhook to Jenkins for Bitbucket Server dialog.

Bitbucket configuration - project level
In addition to configuring Webhook to Jenkins at a Bitbucket repository level, you can also configure it at a project level, providing access to Webhook to Jenkins for all repositories in that project.
Before you begin, you must have at least one repository in the project that has Webhooks to Jenkins enabled and set to Inherited.
To confirm a repository has been set to Inherited, log in to Bitbucket as an Administrator, go to Repository Settings > Hooks > Webhook to Jenkins for Bitbucket and select Inherited (enabled) if not already set.

Confirm you are logged into Bitbucket as an Administrator.
Select the project you want to associate with Jenkins
Click Project Settings from the left sidebar.
Click Hooks.
Locate Webhooks to Jenkins for Bitbucket Server and click the toggle to open the Webhook to Jenkins for Bitbucket Server dialog.
Jenkins Instance(s) tab
The Jenkins Instance(s) section contains the primary fields required to configure your Webhook to Jenkins application.
All tabs have a Test Configuration button that allows you to perform a configuration check by sending a commit request to Jenkins.
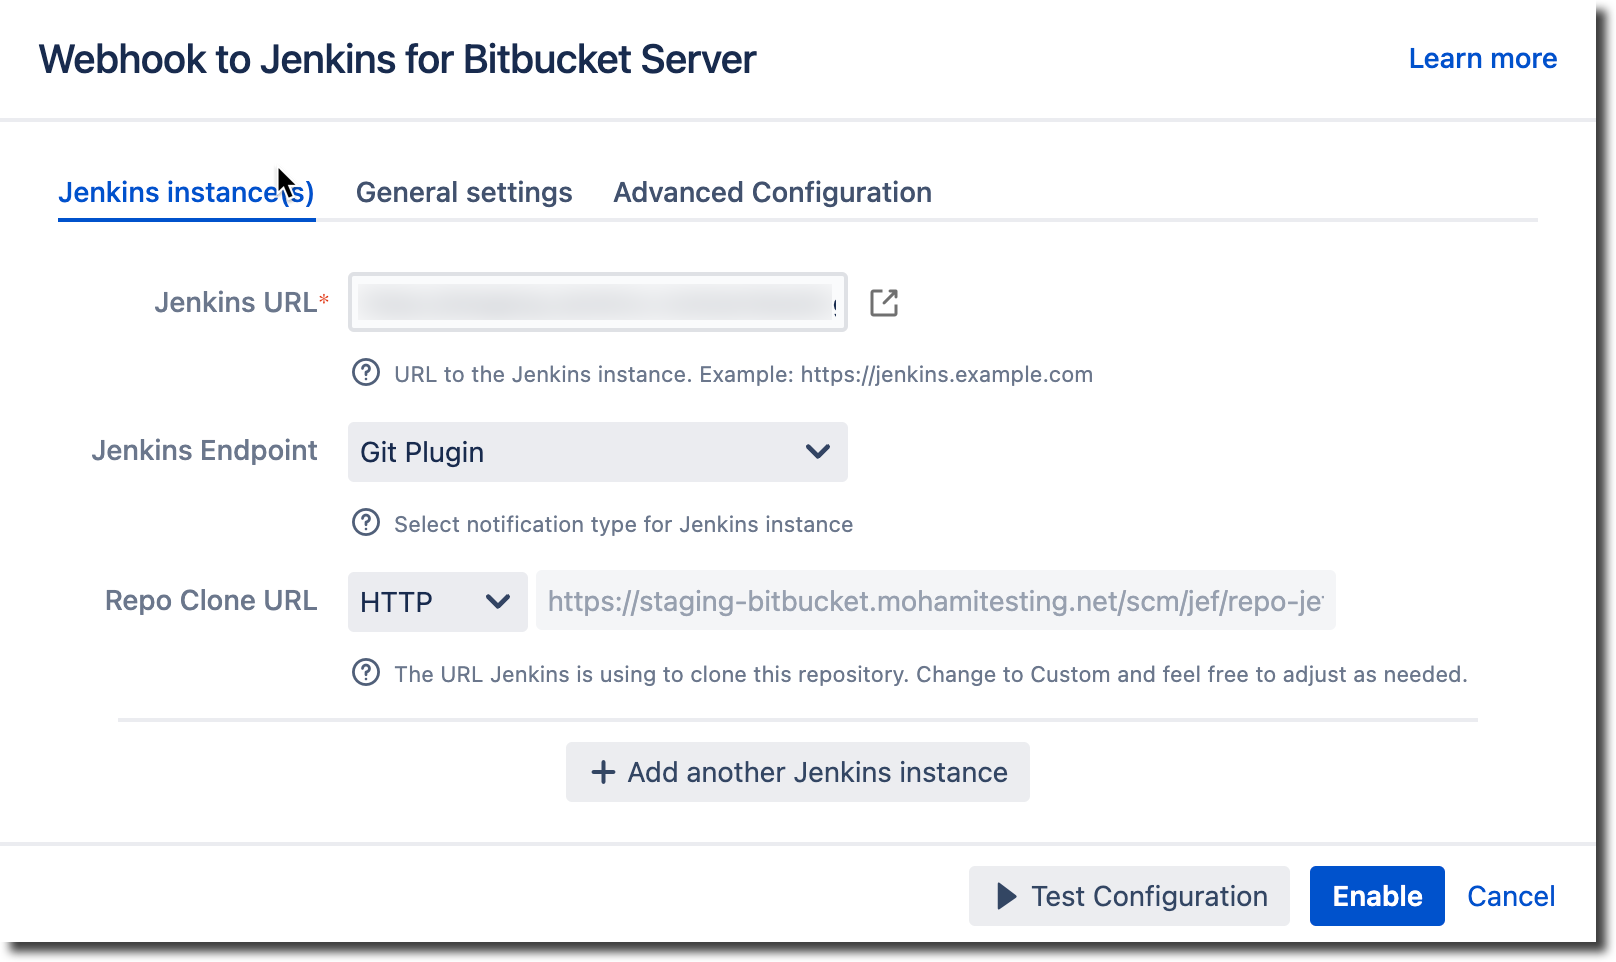
Jenkins URL - Enter the URL to the Jenkins instance. This is the base URL for your Jenkins instance, not a link to a specific job. For example, https://abc.yourtestingjenkins.net.
Jenkins Endpoint - Select an endpoint from the dropdown. Select from the following options:
Bitbucket Source plugin - This allows Jenkins to use Bitbucket Server as a source for multi-branch projects. It also provides the required connectors for the Bitbucket Server Project folder (also known as repositories auto-discovering). The Repo Clone URL feature is unavailable if using the Bitbucket source Plugin.
Git plugin - Provides fundamental git operations for Jenkins projects. It can poll, fetch, checkout, branch, list, merge, tag, and push repositories. If you use the Git Plugin endpoint, the URL Parameter feature from the Advanced Configuration tab is unavailable.
Direct Job Trigger -This endpoint allows you to emulate the click of the Build Now button on the Jenkins job page for selected jobs. When the hook event is fired, it has the same effect as clicking this button manually for required jobs. Selecting this endpoint opens the Jobs List field. Type the name of the Jenkins job to see the list of matching jobs for this repository and select up to a maximum of five jobs to be triggered by Webhook to Jenkins. See Configuring with Direct Job Trigger for details.
If you have created a Jenkins Pipeline job using the Blue Ocean plugin, the Bitbucket Branch Source plugin option is recommended.
Git plugin version 4.11.4 or higher requires the notifyCommit token. See the Access token requirements for Git plugin 4.11.4+ article for instructions regarding generating and using the token.
To determine which plugin your Jenkins instance currently uses, log into your Jenkins instance, and from the Dashboard, Click Manage Jenkins. Under System Configuration, select Manage Plugin and look for either the Git or Bitbucket Branch Source plugin. If neither plugin is shown, visit the Bitbucket Branch Source or Git plugin pages for information and download location, and consult your system administrator. If both plugins are present, examine the jobs you want to trigger and select the plugin that best matches your requirements.
Freestyle project - use the Git plugin
Configuration - If the job has the Poll SCM checkbox, use the Git plugin
Configuration - If the job has the Branch Sources section, use the Bitbucket Branch Source plugin
See the What plugin should I use page for more information.
Repo Clone URL - If the repo has been cloned, add the URL to the repo clone here. Select one of the following options from the dropdown.
HTTP
SSH
Custom - The custom option should only be used in one of the following scenarios:
Jenkins and Bitbucket are in a private network
Bitbucket is also available to an external network
Bitbucket has different hostnames for internal and external networks
Jobs on Jenkins reference Bitbucket using the internal name
The default clone URL is based on an external name
The Repo Clone URL option is only available when using the Git plugin.
Mirror Server - If you use Smart Mirroring with your Bitbucket instance, the Mirror Server field is available from the Jenkins Instance tab. Select the mirror server from the dropdown. Refer to Configure Webhook to Jenkins with Smart Mirrors for more information.
The Mirror Server feature is only available when using the Git plugin.
General settings
The General settings section provides access to commonly used features associated with Webhooks to Jenkins.
All tabs have a Test Configuration button that allows you to perform a configuration check by sending a commit request to Jenkins.
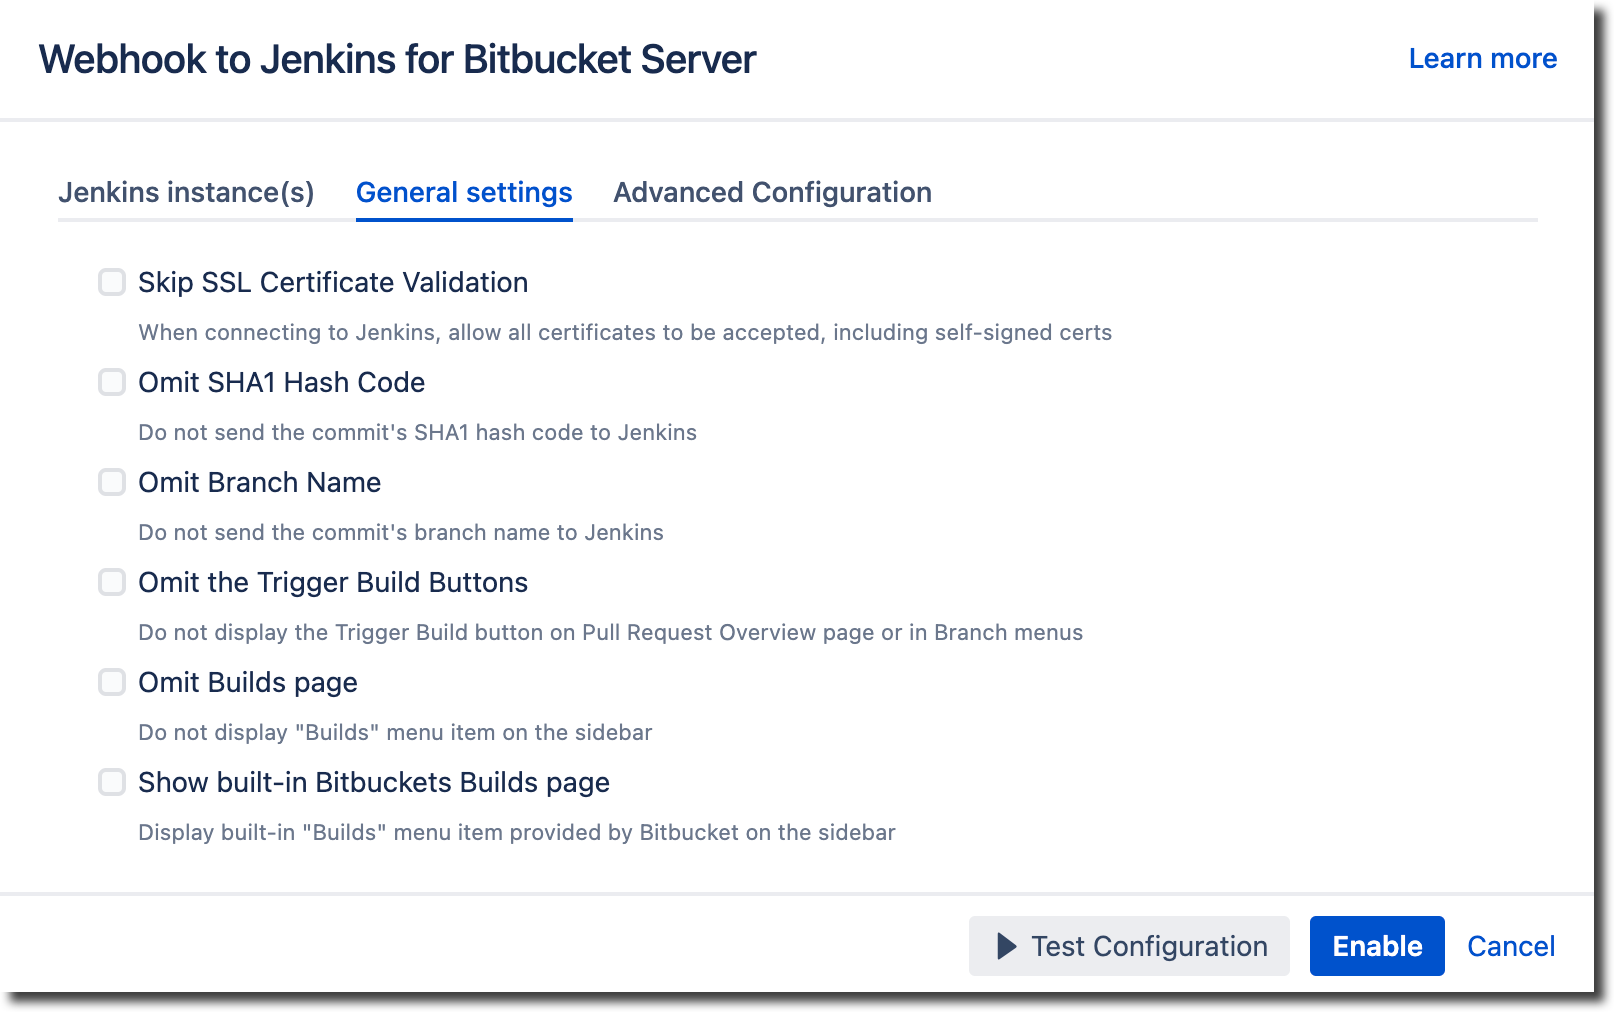
Skip SSL Certificate Validation - Sometimes, self-signed certificates cause the client (Bitbucket) to deny the trigger build request. When selected, this option allows all certificates to be accepted, including self-signed certificates. Typically, this is used in test environments.
Omit SHA1 Hash Code - This option prevents the commit’s SHA1 hash code from being included in the trigger build request sent to Jenkins.
Omit Branch Name - This option prevents the commit’s branch name from being sent to Jenkins or the rest of the trigger build request.
Omit the Trigger Build Buttons - This option removes the Trigger Build button on the Pull Request, Branch, Source, and Commit pages.
Omit Builds page - Since you can add the Webhook to the Jenkins Builds page menu item, having two build menu items can be confusing. This option allows you to remove the Webhook to Jenkins Builds menu item from the sidebar.
Show built-in Bitbuckets Builds page (not available on all versions of Bitbucket) - Webhook to Jenkins has its own Builds page, separate from the standard Builds page provided by Bitbucket. This option offers an additional Builds item on the menu sidebar when selected. Click this menu item to open the Bitbucket Builds page.
Advanced configuration
The Advanced Configuration section contains additional options to control when, how, and by whom builds are triggered.
All tabs have a Test Configuration button that allows you to perform a configuration check by sending a commit request to Jenkins.
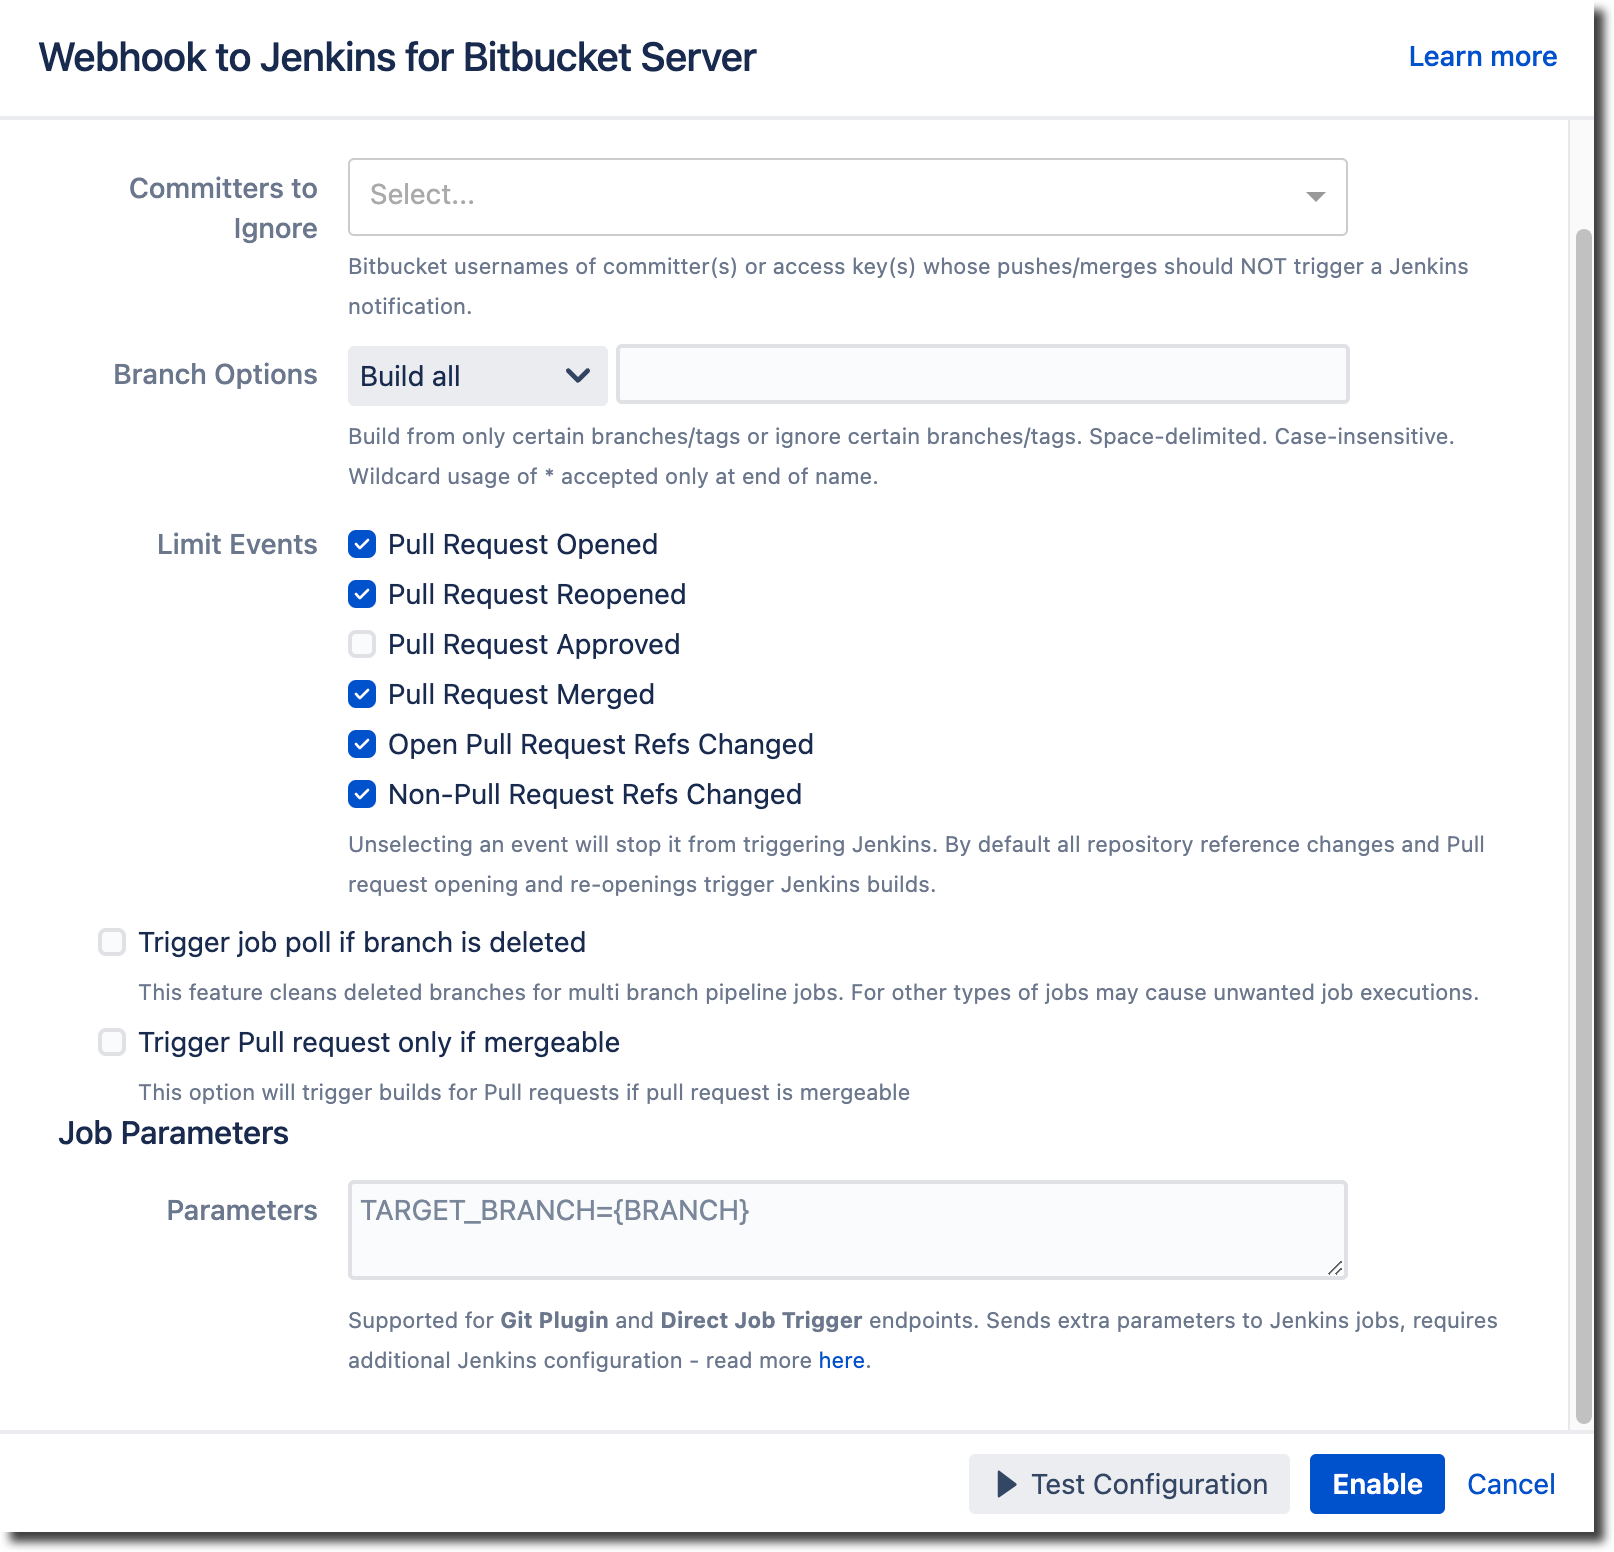
Committers to Ignore - Select or enter the names of Bitbucket committers or access keys whose pushes/merges should NOT trigger a Jenkins notification.
Branch Options - Control the branches and tags allowed to build from. Refer to Trigger Jenkins for commits to a specific branch for details.
Limit Events - An event does not trigger a Jenkins build when that Limit Events option is removed. Refer to Limiting events which trigger Jenkins for details.
Trigger job poll if the branch is deleted - When a branch is merged or deleted in Bitbucket, select this option for Jenkins to remove the branch from its pipeline.
Trigger Pull request only if mergeable - Selecting this option only allows a build to trigger if the pull request is mergeable.
Job Parameters - Use this option to send custom URL parameters to Jenkins during the notification/trigger process. To use this option, you must also configure Jenkins to accept URL parameters. See Sending URL Parameters for details.
The Job Parameters feature is only available when using Git Plugin or Direct Job Trigger endpoints.
Once you have set all your options, click Enable.