Jenkins configuration
Configure the Jenkins side of your Webhook to Jenkins implementation through the Jenkins Classic UI or the Blue Ocean plugin.
Before proceeding with your Jenkins configuration, determine the type of job you are creating or editing. The job type you have can impact the kind of plugin you will use and, consequently, the configuration steps you follow. The What plugin should I use page provides information regarding which plugin is used with different jobs and applications.
Jenkins configuration - Classic UI
The Jenkins configuration steps are different depending on the plugin you use as the Jenkins endpoint in your Webhook to Jenkins configuration. Refer to the What plugin should I use page for information regarding each plugin, and follow the Bitbucket Branch Source plugin or Git plugin instructions below, depending on the plugin you use.
Bitbucket Branch Source plugin
Log into your Jenkins instance.
Go to Manage Jenkins → Configure System and scroll down to Bitbucket Endpoints.

Click the Add button and select Bitbucket Server from the dropdown.
Enter the Name and Server URL for your endpoint and confirm the Bitbucket version selected in the Server Version dropdown is correct. If you have a Manage Hooks checkbox, make sure it's unchecked.

Click Save.
Configure Jenkins multibranch pipeline job
These instructions apply to Multibranch Pipeline jobs and Bitbucket Team Jobs. Other Jenkins jobs do not have the Branch Source configuration option available.
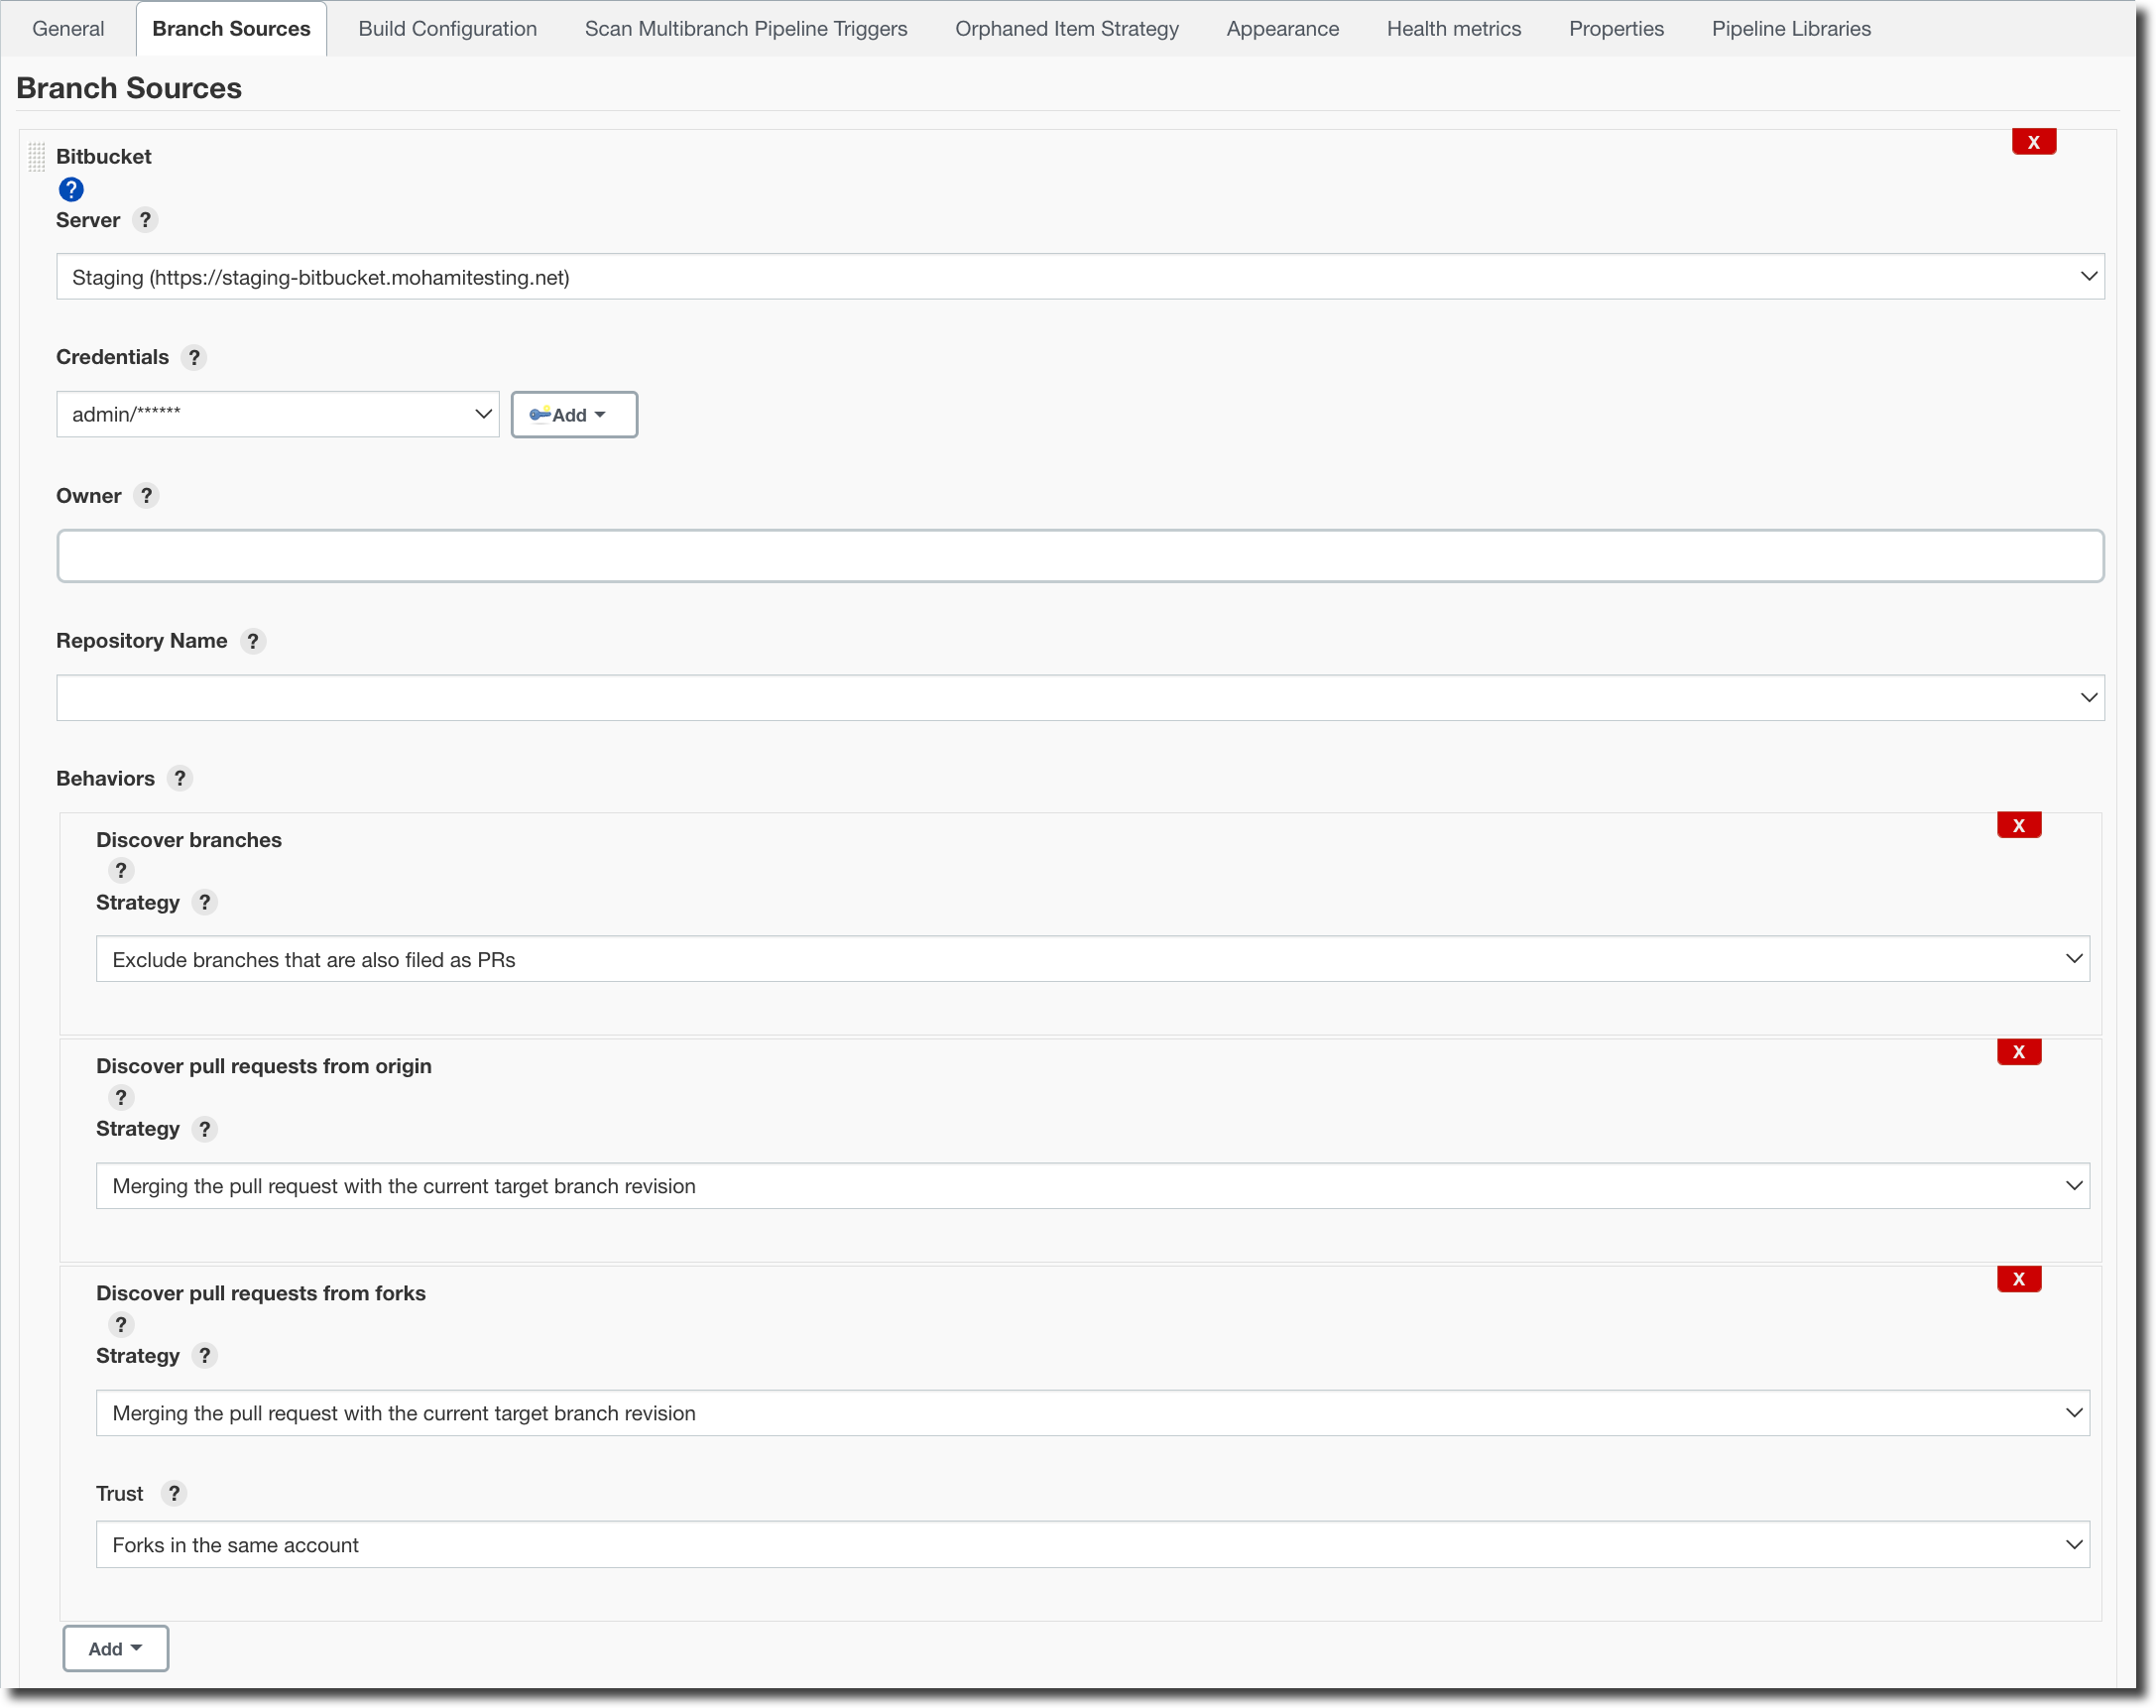
On the Job configuration screen, scroll down to the Branch Sources section (for a Bitbucket Project configuration, this section is called Projects).
Click Add Source and select Bitbucket to expand the section.

Enter information in the following fields:
Server - select the Bitbucket Server endpoint you added in the Bitbucket Branch Source plugin section
Credentials -select your administrator Bitbucket credentials if you have not already, and select them
Owner - this can be the Bitbucket project or username under which the repository is hosted under
Repository Name - select the name of the Bitbucket repository associated with this Jenkins job.The remaining entries are considered optional for these configuration steps.
When the Jenkins configuration is complete, continue to the Bitbucket configuration section.
Git plugin
Log into your Jenkins instance.
Add or select the job you want to associate with your Bitbucket repository.
Once you are in the job, click Configure from the left menu.

Select the Source Code Management tab and the Git option when the Configuration page opens.
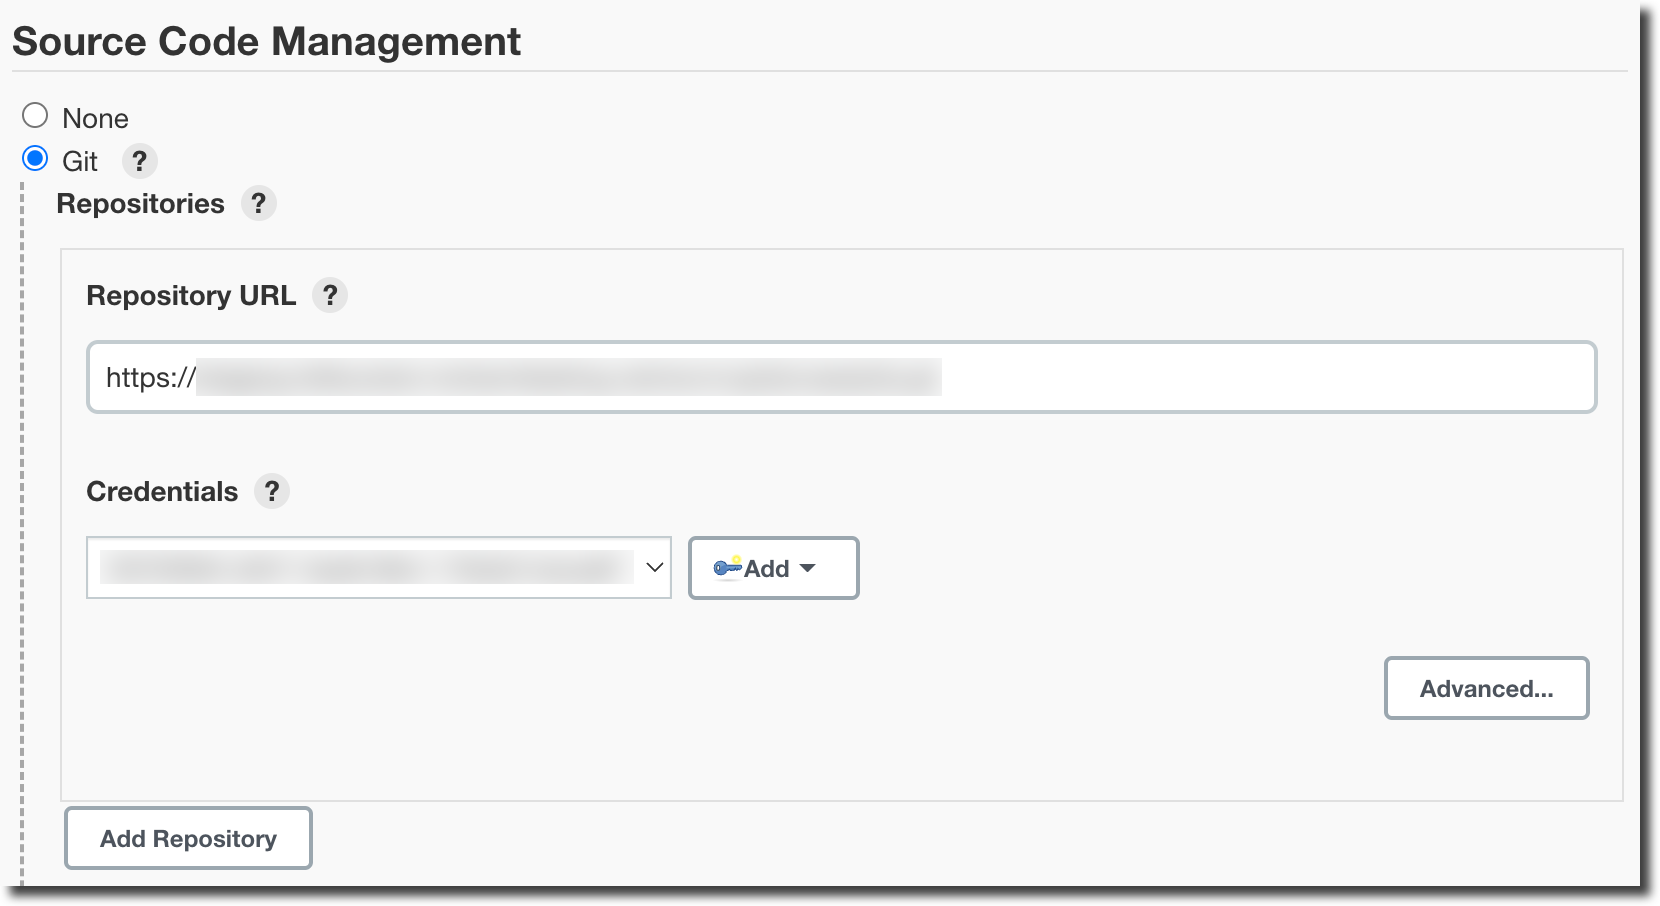
In the Repository URL field, enter the URL for the Bitbucket repository you want Jenkins to integrate with.
Click Add to open the Jenkins Credentials Provider dialog and enter your credentials in the appropriate field. Click Add.
Select the Build Trigger tab.

Select Poll SCM. This is an important step, as the build won’t trigger in Jenkins if this option is not selected.
Git plugin version 4.11.4 or higher requires the notifyCommit token. See "Access token requirements for Git plugin 4.11.4+ article for instructions regarding generating and using the token.
When the Jenkins configuration is complete, continue to the Bitbucket configuration section.
With pipeline jobs, Jenkins also requires at least one successful build in the build history. If there is nothing in the build history, Webhook to Jenkins will not work as expected. When using other Jenkins jobs, this condition is not required.
Jenkins configuration - Blue Ocean
Blue Ocean is a Jenkins front-end that provides users with an improved experience when creating pipeline jobs. For complete information regarding Blue Ocean, refer to their documentation.
To trigger a Jenkins job through Webhook to Jenkins using Blue Ocean, confirm the following:
The Bitbucket Branch Source plugin has been installed in Jenkins. You can also use the Git Plugin if you use a Multibranch Pipeline job, but the Bitbucket Branch Source plugin is recommended.
Configure the Bitbucket Endpoint in Jenkins
The Bitbucket repository contains a Jenkinsfile (at the end of creating a new pipeline, Jenkins looks for this file in your Bitbucket repository. If it does not find it, it will give you the option of creating a Jenkinsfile).
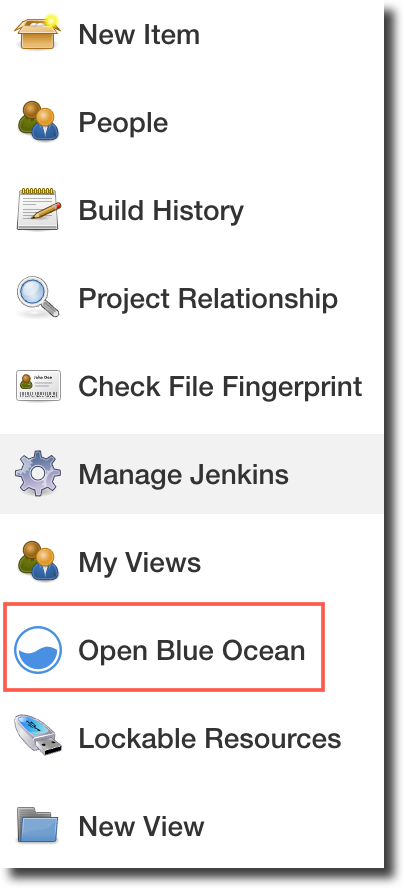
Log into your Jenkins instance. If you do not have the Blue Ocean dashboard open, select Open Blue Ocean from the main Dashboard page. If you need to exit Blue Ocean, click the exit button in the top right of the page, next to the Logout button.
The plugin used determines the configuration steps required to configure Jenkins to work with Webhook to Jenkins. Bitbucket Branch source plugin is the recommended plugin; however, you can use the Git plugin with a Jenkins multibranch pipeline job. Follow one of the workflows below, depending on the plugin you use.
Bitbucket Branch Source plugin
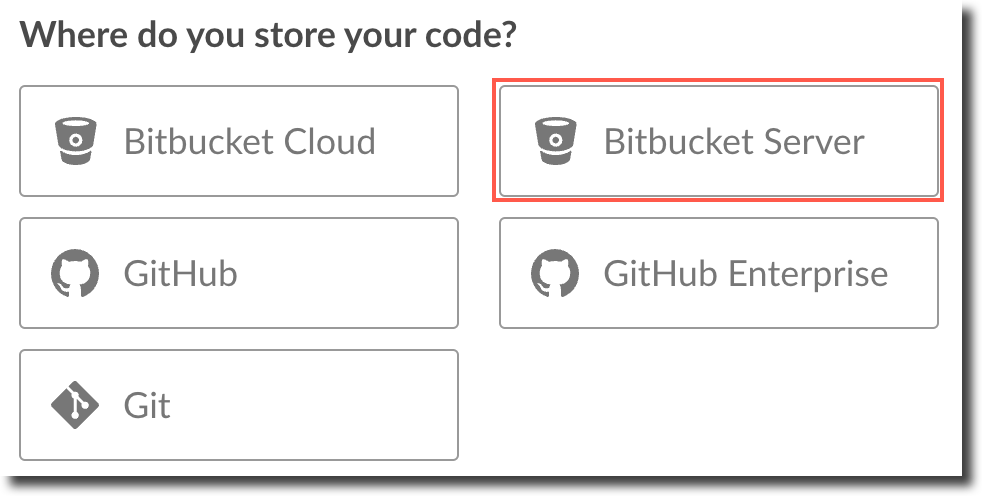
Click New Pipeline.
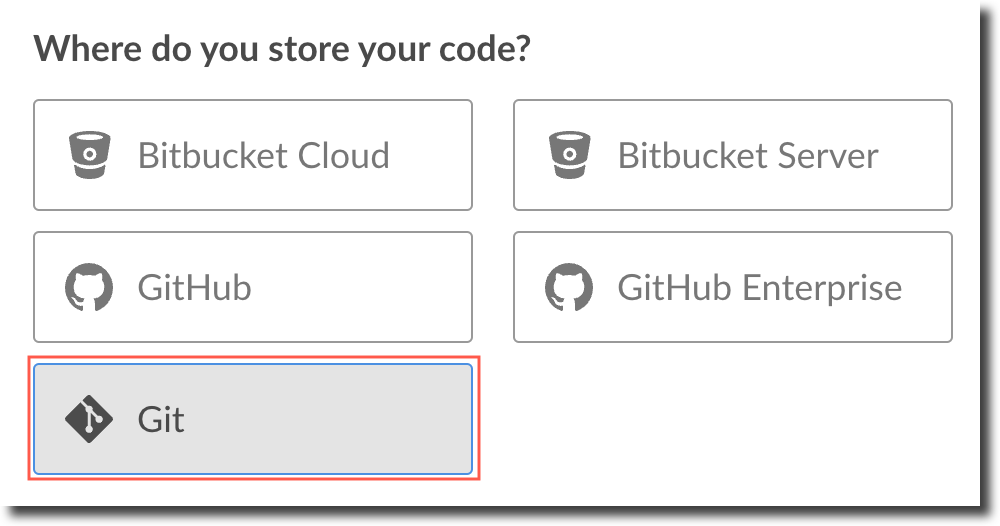
Select Bitbucket Server from the Where do your store your code? options.
The Where is your Bitbucket server? section opens.
If you have previously added the Bitbucket server location, select it from the dropdown; otherwise, click Add.
Enter the Bitbucket Server Name and Server URL in their respective fields.
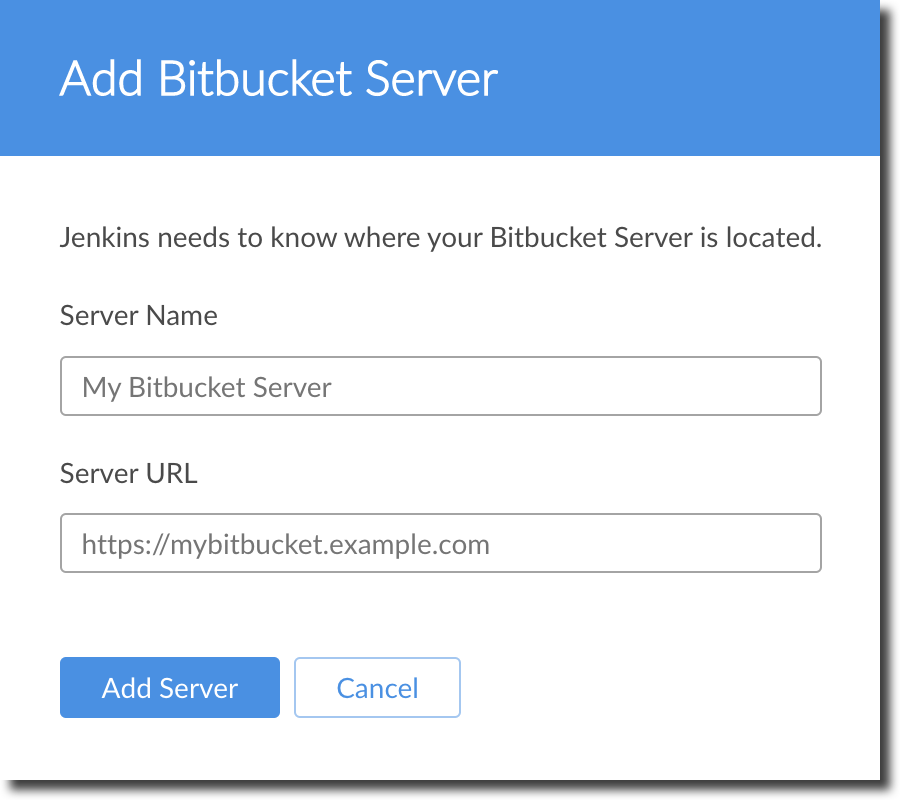
Click Add server, confirm the location is selected in the dropdown, and click Next. The Connect to Bitbucket section opens.
Provide your Bitbucket user credentials in the Username and Password fields and click Connect. This provides the logged-in Jenkins account access to your Bitbucket instance.
In the Which team does the repository belong to? section, click either:
Your Bitbucket account to create a Pipeline project for one of your Bitbucket repositories.
A team of which you are a member to create a Pipeline project for a Bitbucket repository located within this team.
In the Choose a repository section, click the repository from which to build your Pipeline project. If your list of repositories is long, filter this list using the Search option.
Click Create Pipeline.
Git plugin (use Multibranch Pipeline job)
Click New Pipeline.
Select Git from the Where do you store your code? options.
The Connect to a Git repository section opens.
Enter the Bitbucket Repository URL. If required, provide your Bitbucket user credentials in the Username and Password fields. This provides the logged-in Jenkins account access to your repository.
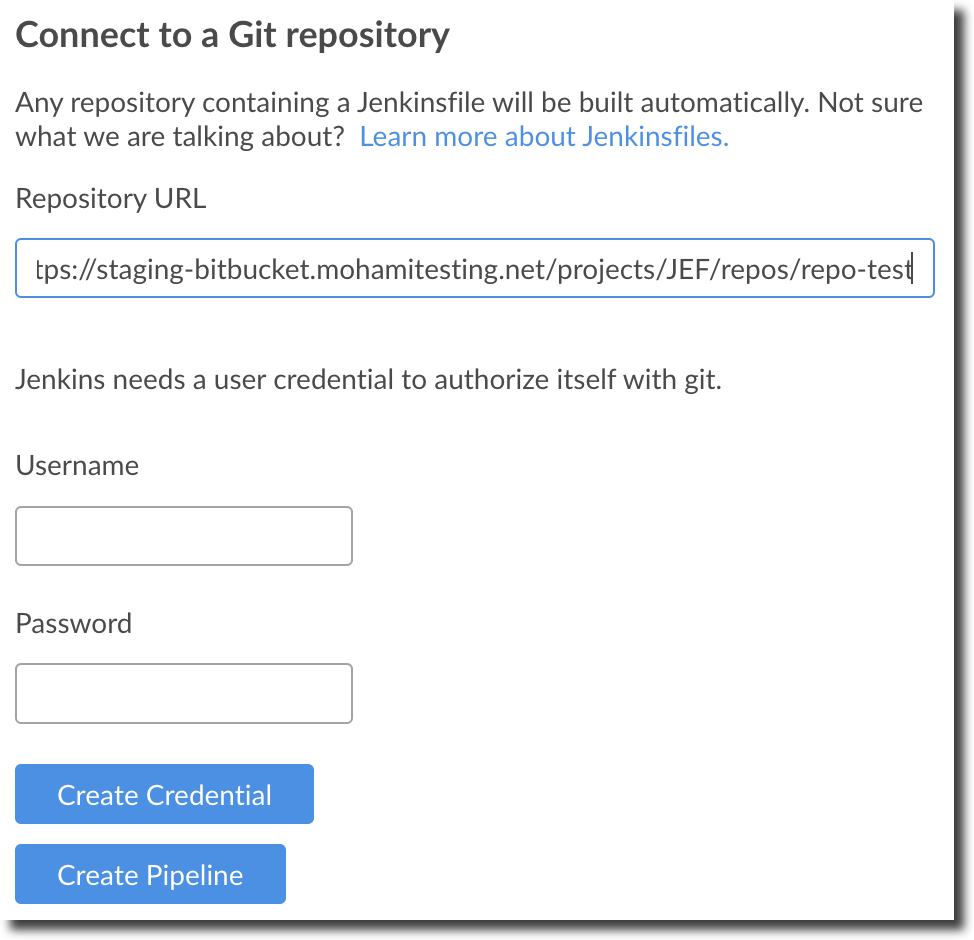
Click Create Pipeline.
Blue Ocean scans your local repository for a Jenkinsfile. If it doesn’t find one, you are prompted to create one.
When the Jenkins configuration is complete, continue to the Bitbucket configuration section.